Category: Security

Even Yahoo is not able to keep track of it’s SSL certificates expiration

I have always thought that the “Internet Giants” have proper monitoring and procedures in place to keep track of their SSL certificates expiration dates. But as it turns out Yahoo does not.

In some instances of Yahoo advertisements they are still using a certificate that expired over a month ago. Today (07.08.2019) I am still at random getting an error about Yahoos advertisements certificate being expired:

WhatsApp used to interact with ATMs in Brazil

Happened upon a interesting article today – https://www.zdnet.com/article/banco-do-brasil-launches-cash-withdrawals-via-whatsapp/. As URL already states they are enabling users to withdraw cash from ATM’s via WhatsApp.

Basically what they say is that, the user needs to add a chatbot to their contact list and ask it for money. Then the chatbot gives them a “key” that is valid for a day. Although the service has a 80$ transaction limit, it still feels like a bad idea to me. I can already feel the new “malware wave” coming that tries to exploit this thing on the phones.

When thinking about this service, I really would love to see the analysis they made to say this is a really secure thing to do. How is this channel secured? How are they protecting people against “theft via malware”? I feel like I need to do some research in to that.

Malware campaigns are going even after the smaller “markets”

Yesterday I happened to read a warning by the Estonian police, that there is a new malware campaign. The fact that there is a malware campaign going on is not news to anyone. But what actually caught my attention was the translation quality on the phishing sites.

The warning had a screenshot of a site spreading malware was the classic your computer is infected with a virus scam, but for smart phones. Sites like that have been used for a long time. But the quality of translation has been really bad for those sites. This time the message had quite good quality and a lot of people might actually fall for it.

The message there basically stated that the user had visited a site containing malware or porn and might be infected with a virus. It also contained a threat that your ISP will block your internet access. They have scripted the ISP part, so that they try to get the ISP name from your IP address.

Besides the rise of quality of the phishing text and translation based on the localization info, a lot of the phishing sites have also moved on to using HTTPS. Malware sites have started using certificates that are accepted by web browsers making them a bit harder to detect by unsuspecting users.

It is the first time in years I felt like doing a refresher to my parents on recognizing malicious sites.

No more digital privacy in Australia

As it turns out the Australian House of Representatives has actually passed the “Telecommunications Assistance and Access Bill”. It is basically an anti-privacy bill that should come in to effect as a law early in 2019. It basically requires tech companies to provide access to users encrypted data to law enforcement agencies. Talk of similar laws has been around for a long time already, but no one had actually passed such laws.

Although quite a few people are calling it an anti-encryption bill, it actually doesn’t require the weakening of end to end encryption in the applications/services. What they require is that access to unencrypted data be provided in from the end devices or from some other point where the data is in plain text form. In that sense it is a bit better than other anti-privacy laws that I have heard of. They have acknowledged that weakening the encryption would grant anyone access to the data. But is forcing tech companies to make call-home features or back-doors to everything better? I think that it is a bit better than having weak encryption.

But I also think that such anti-privacy features can still be abused by hackers. As soon as you add a back-door, there is a risk that someone could get access to it and abuse it. There is no guarantee that only the legitimate users would get access to it. And as always it is said that the features would be only used when necessary. So they are trying to say that it wouldn’t be an all-out spying campaign on all the users all the time. But then the good old question comes to mind. How can you be sure that they are not spying on everyone? Simple, you can’t be. As soon as the possibility of eavesdropping exists there is no guarantee of privacy.

What’s up with all the bad passwords out there

A bit over a week ago the list of the worst passwords of the year (2018) was released by SplashData. You can review it yourself at https://www.teamsid.com/100-worst-passwords-top-50/.

After having a look at it I found myself amazed at the people’s choices of password. It just baffles me that people are still using passwords like “password” or “1234” as their password and when websites require longer passwords they just keep counting up the numbers instead of “1234” its now “12345678..”.

Do people still actually think that their passwords don’t matter? That no one will guess their username and password? By now almost everybody must have heard of the constant take overs of peoples social media accounts through simple password guessing. If not that, then people surely must have already come in contact with some one trying to log in to their account at some point – warnings at Gmail or similar services. Surely that should make people think.

In order for a password to resist simple brute force attacks it doesn’t have to be too complicated and something that is hard to remember like “x1Ds$!abFrdc?”. You can just your favorite quote from somewhere, which would be very easy to remember and much more secure than the ones on the list. To be a bit on the safer side you can add something to the beginning or ending of it. That would just be a precaution against some attackers that actually do some research on you. So that it wouldn’t happen that an attacker sees that The Simpsons is your favorite TV-show and would guess that your password is “Eatmyshorts!”

Using KeePass and KeeAgent on MacOS to handle SSH keys

This is the second a follow up post to the issue described in my previous post describing the issue with SSH keys being re-usable by anyone with privileged access on the SSH server. (Read more) This time the post is about a workaround to the issue on MacOS and in other words how to get KeePass and KeeAgent working on MacOS. Unfortunately KeePassX/KeePassXC the ports of KeePass that have MacOS native variants do not support plugins. So in order to get the KeeAgent plugin working, we need to run the Windows KeePass application using Mono.

Pre-requisites

  • Mono installed on your Mac. (Can be found at http://www.mono-project.com/download/)
  • A SSH private key in Putty format(.ppk) and the public key set on the SSH server authorized keys file.

Getting Ready

As mentioned previously we will be using the password manager called KeePass and it’s plugin called KeeAgent to store and present the SSH private key to putty. So lets get started.

  1. KeePass can be found at  https://keepass.info/ you need to download the portable version 2.xx (current version is 2.38) and unzip it.
  2. Install KeeAgent plugin which can be found at https://lechnology.com/software/keeagent/. Download it and unzip the file called KeeAgent.plgx to KeePass plugins directory – folder called plugins in the folder you unzipped.

Making KeePass run almost like a native app

To make KeePass a bit more comfortable to use, lets make it feel more like a native App. In order to do that do the following:

  • Make the App directory, by opening the terminal and inserting the following command:
mkdir -p/Applications/KeePass.app/Contents/MacOS
  • Move everything in the previously unzipped KeePass folder to /Applications/KeePass.app/Contents/MacOS
mv ~/Download/KeePass-2.38/* /Applications/KeePass.app/Contents/MacOS/
  • Create a shell script named KeePass in the same directory that will start up KeePass:
  • tee -a /Applications/KeePass.app/Contents/MacOS/KeePass << END
    #!/usr/bin/env bash
    /usr/local/bin/mono /Applications/KeePass.app/Contents/MacOS/KeePass.exe &
    END
  • Almost done, now you can start KeePass with a click of a button, but it isn’t ready yet to be used as a SSH key agent.

Getting the SSH key agent functionality working

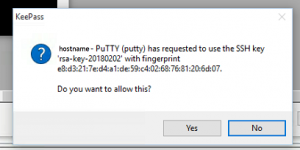
Getting KeePass to work as an SSH key agent is a bit tricky, but nothing overwhelming. In order to do it you need to edit a few configuration files and add a script that would ask for confirmation. To achieve this it is necessary to disable System Integrity Protection(SIP) temporarily.

So as the first thing disable SIP temporarily by following the guidelines that can be found at https://www.imore.com/el-capitan-system-integrity-protection-helps-keep-malware-away.

After you log back in with SIP disabled you now should be able to add the ssh-ask-pass script to your system. To do that add the following text in to copy/paste the following text in to a file using your favourite text editor and save it on to your desktop to a file called ssh-askpass:

#!/bin/bash

# Script: ssh-askpass

# Author: Mark Carver# Created: 2011-09-14

# Licensed under GPL 3.0

# A ssh-askpass command for Mac OS X

# Based from author: Joseph Mocker, Sun Microsystems

# http://blogs.oracle.com/mock/entry/and_now_chicken_of_the 

# To use this script:

#   Install this script running INSTALL as root

# If you plan on manually installing this script, please note that you will have

# to set the following variable for SSH to recognize where the script is located:

#   export SSH_ASKPASS="/path/to/ssh-askpass" 

TITLE="${SSH_ASKPASS_TITLE:-SSH}";

TEXT="$(whoami)'s password:";

IFS=$(printf "\n");

CODE=("on GetCurrentApp()");

CODE=(${CODE[*]} "tell application \"System Events\" to get short name of first process whose frontmost is true");

CODE=(${CODE[*]} "end GetCurrentApp");

CODE=(${CODE[*]} "tell application GetCurrentApp()");

CODE=(${CODE[*]} "activate");

CODE=(${CODE[*]} "display dialog \"${@:-$TEXT}\" default answer \"\" with title \"${TITLE}\" with icon caution with hidden answer");

CODE=(${CODE[*]} "text returned of result");

CODE=(${CODE[*]} "end tell");

SCRIPT="/usr/bin/osascript"

for LINE in ${CODE[*]}; do

    SCRIPT="${SCRIPT} -e $(printf "%q" "${LINE}")";

done;

eval "${SCRIPT}";

After saving the script move it to/usr/X11R6/bin/ssh-askpass and set its permissions. The target folder usually doesn’t exist by default and you need to create it. To achieve the aforementioned tasks do the following in the terminal:

sudo mdkir -p /usr/X11R6/bin/
sudo mv ~/Desktop/ssh-askpass /usr/X11R6/bin/ssh-askpass
sudo chown -R root:wheel /usr/X11R6
chmod a+rx /usr/X11R6/bin/ssh-askpass

Now you can re-enable SIP.

Starting KeePass for the first time

Now you can test it out by starting KeepAss, be aware that the first time loading KeePass in mono can be really slow. Next follow the same steps as were in Windows , they can be found in the KeePass Windows article here.
Now if you have your KeePass ready for use try it out in terminal by connecting to your desired host via ssh by simply issuing the “ssh username@host” command.

Safer SSH key usage on Windows than just using Putty pageant

This is the first a follow up post describing a work around on Windows to the issue described in my previous post describing the issue with SSH keys being re-usable by anyone with privileged access on the SSH server. (Read more). Basically the workaround is to use KeePass and it’s plugin called KeeAgent instead of using putty’s pageant to present the SSH key to Putty.

Pre-requisites

  • Putty installed on your computer
  • A SSH private key in Putty format(.ppk) and the public key set on the SSH server authorized keys file.

Getting Ready

As mentioned previously we will be using the password manager called KeePass and it’s plugin called KeeAgent to store and present the SSH private key to putty. So lets get started.

  1. KeePass can be found at  https://keepass.info/ you need to download version 2.xx (current version is 2.38) and install it.
  2. Install KeeAgent plugin which can be found at https://lechnology.com/software/keeagent/, download it and unzip the file called KeeAgent.plgx to KeePass plugins dir (C:\Program Files (x86)\KeePass Password Safe 2\Plugins)
  3. Start KeePass

Using KeePass and KeeAgent for handling the SSH keys

  1. Create new password database and set the password you want.
  2. Add a new password entry to the password database to do that in the menu go to “Edit -> Add New Entry” or just press the new entry button.
  3. Whilst creating the new password entry set the password in the entry to be the same as it is on your .ppk file
  4. Go to the Advanced tab and in the Attachments section attach your .ppk file
  5. Go to the KeeAgent tab, tick the box allowing KeeAgent to use this entry. After that tick the box “use confirm constraint”.  Set the private key location to attachment and select the previously attached file. If the password has been set correctly and the attachment is a valid .ppk file it should show public key info below.
  6. Next navigate in the menu to Tools -> KeeAgent and click on it. In the window that opened click on “Add..” , select “From KeePass..” and select the previously imported key. Verify that the require confirmation box is ticked and click ok.
  7. Now open up Putty and try connecting to some SSH server where your key should work.

If all is working as it is supposed to the following prompt should pop up asking for permission on the private key usage every time it is being accessed by a new session:

KeeAgent-Prompt

The prompt will show the hostname where the key is being accessed and the key description (name and fingerprint).

SSH key based authentication secure and convenient or is it?

SSH key based authentication secure and convenient or is it? Well that seems really obvious that it is secure and convenient no passwords to be guessed and changed all the time, or that can be guessed logging on to servers much faster. But when done improperly it isn’t that safe and secure as it would seem.

The issue

When logging on to SSH servers using authentication agent forwarding for convenience so you could jump hosts using the same key. See nothing wrong with it?  Still seems all good and  secure? Well not that secure any more, as soon as convenience of the authentication agent forwarding comes to play a little issue arrises that a lot of people do not think about. Namely the key you used to authenticate to the server is now accessible to others on the server, not in the sense that they could copy it, but they can use it to authenticate to other servers where your key would be valid and that are accessible from that server. Although it requires escalated privileges to get access to it, it is still a problem. So where is this key located? It goes to the /tmp/ folder. As the following is an example from my test machine:

huxx@lnx:~# ls -la /tmp/

total 10

drwxrwxrwt 10 root     root     3072 Feb  1 01:00 .

drwxr-xr-x 23 root     root     4096 Jun  2  2015 ..

drwx------  2 huxx     huxx     1024 Feb  1 00:36 ssh-DhNiAzWTEV
huxx@lnx:~# ls -la /tmp/ssh-DhNiAzWTEV

total 4

drwx------  2 huxx huxx 1024 Feb  1 00:36 .

drwxrwxrwt 10 root root 3072 Feb  1 01:01 ..

srwxr-xr-x  1 huxx huxx    0 Feb  1 00:36 agent.18922

Is there a solution for it?

So is there a solution for the afore mentioned issue? Well luckily  Yes there is. There are SSH key agents out there that actually ask for your permission first before allowing access to the private key. For Windows one such solution would be to use the KeeAgent plugin for the password manager called KeePass it allows to set a password/confirmation to be prompted for every time someone/something tries to access the private key. The same combination will also work on macOS with a bit of work by porting the Windows application using mono for Mac and adding ssh-askpass script to the system. The exact solutions will be shown in followup posts to come.

Edit:
Solution for Windows users described here: https://www.huxxit.com/index.php/2018/02/02/safer-ssh-key-usage-windows-just-using-putty-pageant/

New server on the web…

So this site has been up for a few hours now and already there have been multiple scans on it. To be honest I was actually wondering how little time it would take for the first scans to arrive.  It took merely 15 minutes for my little web server to be found by some script that is already trying to get in through Basic HTTP authentication on it.
Just some example snippets from my log:

185.107.83.26 - admin [29/Jan/2018:01:21:55 +0200] "GET / HTTP/1.1" 401 2138 "https://84.50.132.89/" "Mozilla/5.0 (Windows NT 5.1; rv:9.0.1) Gecko/20100101 Firefox/9.0.1"
185.107.83.26 - cisco [29/Jan/2018:01:21:45 +0200] "GET / HTTP/1.1" 401 682 "http://84.50.132.89/" "Mozilla/5.0 (Windows NT 5.1; rv:9.0.1) Gecko/20100101 Firefox/9.0.1"
185.107.83.26 - root [29/Jan/2018:01:21:47 +0200] "GET / HTTP/1.1" 401 682 "http://84.50.132.89/" "Mozilla/5.0 (Windows NT 5.1; rv:9.0.1) Gecko/20100101 Firefox/9.0.1"
185.107.83.26 - user [29/Jan/2018:01:21:47 +0200] "GET / HTTP/1.1" 401 682 "http://84.50.132.89/" "Mozilla/5.0 (Windows NT 5.1; rv:9.0.1) Gecko/20100101 Firefox/9.0.1"
185.107.83.26 - supervisor [29/Jan/2018:01:21:59 +0200] "GET / HTTP/1.1" 401 2138 "https://84.50.132.89/" "Mozilla/5.0 (Windows NT 5.1; rv:9.0.1) Gecko/20100101 Firefox/9.0.1"
185.107.83.26 - Cisco [29/Jan/2018:01:22:10 +0200] "GET / HTTP/1.1" 401 2138 "https://84.50.132.89/" "Mozilla/5.0 (Windows NT 5.1; rv:9.0.1) Gecko/20100101 Firefox/9.0.1"
185.107.83.26 - enable [29/Jan/2018:01:22:13 +0200] "GET / HTTP/1.1" 401 2138 "https://84.50.132.89/" "Mozilla/5.0 (Windows NT 5.1; rv:9.0.1) Gecko/20100101 Firefox/9.0.1"
185.107.83.26 - pnadmin [29/Jan/2018:01:22:13 +0200] "GET / HTTP/1.1" 401 2138 "https://84.50.132.89/" "Mozilla/5.0 (Windows NT 5.1; rv:9.0.1) Gecko/20100101 Firefox/9.0.1"

It seems to be trying out all sorts of different default user names and password combinations.